Getting Started with Windows
This quickstart guide is designed to be straightforward and easy to follow. It guides you through the process of setting up ErsatzTV Next on Windows, including downloading the required tools, configuring the application, and starting the server.
To run ErsatzTV Next on Windows, you need the following tools:
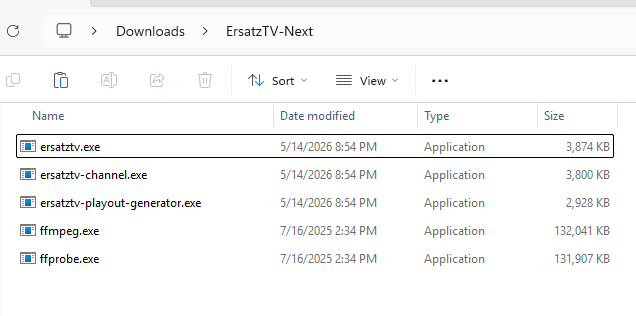
windows-x64 develop release to run ErsatzTV NextInstallation Folder
Download and extract all executable files into a single installation folder. This folder must contain:
ersatztv.exeersatztv-channel.exeersatztv-playout-generator.exeffmpeg.exeffprobe.exe
Config Folder
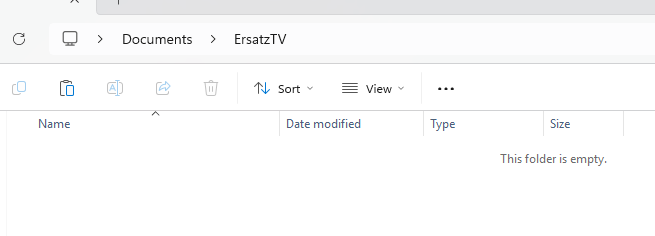
Next, create a folder to store the ErsatzTV Next configuration files. In this guide, the folder ErsatzTV is created under the user's Documents folder, for example:
C:\Users\Jason\Documents\ErsatzTV
At this point, the config folder should be empty.
Create a channel
After preparing the installation folder creating the config folder, use the ErsatzTV Next CLI to create a channel.
Right click a blank area in the installation folder and select Open in Terminal. Paste the following command, replacing Jason with your Windows username, then press [enter].
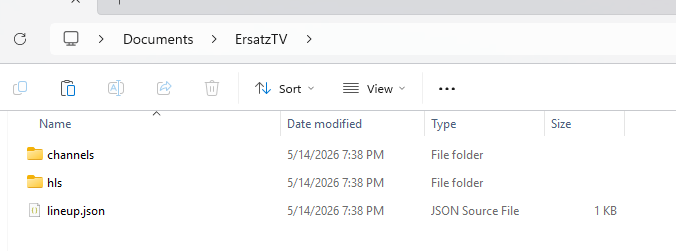
.\ersatztv.exe add-lineup "C:\Users\Jason\Documents\ErsatzTV\lineup.json" --channels 1
This command produces no output, but it creates several files and folders in the config folder.

Add content to the channel
After creating the channel, the next step is to add content. In the same terminal, paste the following command.
Replace Jason with your Windows username. Also replace C:\Users\Jason\Videos with a folder containing your media.
.\ersatztv-playout-generator.exe --lineup "C:\Users\Jason\Documents\ErsatzTV\lineup.json" --channel 1 --content-folder "C:\Users\Jason\Videos"
This command outputs the name of a generated file that tells the channel what content to play and when to play it.

Start the server
Start the ErsatzTV next server so clients can watch the channel.
.\ersatztv.exe "C:\Users\Jason\Documents\ErsatzTV\lineup.json"
This command confirms that the channel loaded successfully. Windows may also prompt you to Allow connections through the Windows Firewall.

Watch the channel
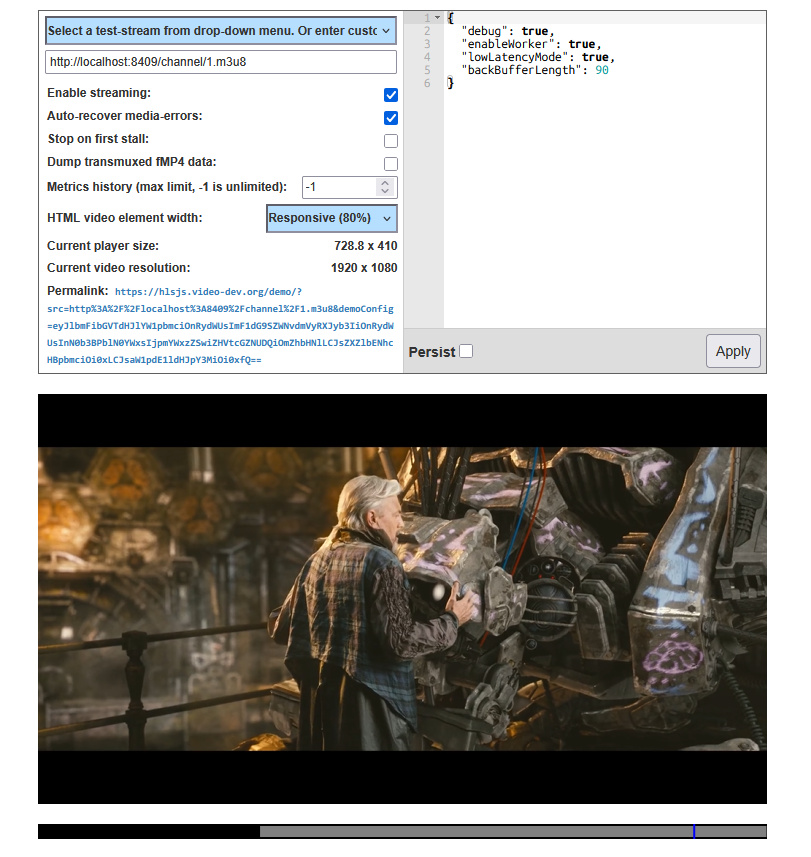
You can now watch the channel using any compatible HLS player.
For quick verification, you can use the following web-based plater, assuming the default configuration values have not been changed. The link is preconfigured to load the channel automatically.
Stop the server
When you are finished watching the channel and want to stop the server, focus the terminal window and press [ctrl]+c.